Hunter Email Finder: How To Use Domain Search To Find Emails
Categories: Legal Marketing Strategies
 Abram Ninoyan
Founder & Senior Performance Marketer
Credentials: Google Partner, Google Ads Search Certified, Google Ads Display Certified, Google Ads Measurement Certified, Google Analytics (IQ) Certified, HubSpot Inbound Certified, HubSpot Social Media Marketing Certified, Conversion Optimization Certified
Expertise: Google Ads, Meta Ads, Conversion Rate Optimization, GA4 & Google Tag Manager, Lead Generation, Marketing Funnel Optimization, PPC Management
LinkedIn Profile
Finding the right contact at a law firm, referral source, or vendor often starts with one thing: a verified email address. Hunter Email Finder is one of the most popular tools for pulling professional...
Key Takeaways
- Hunter Email Finder: How To Use Domain Search To Find Emails
- What Domain Search does and when to use it
- Step 1. Set up Hunter and know your limits
- Step 2. Run a Domain Search and interpret the results
Hunter Email Finder: How To Use Domain Search To Find Emails
Finding the right contact at a law firm, referral source, or vendor often starts with one thing: a verified email address. Hunter Email Finder is one of the most popular tools for pulling professional email addresses from any company domain, and it works whether you're prospecting for co-counsel relationships, pitching vendors, or building referral partnerships that feed your intake pipeline.
At GavelGrow, we help law firms turn marketing spend into signed cases, and outreach is a real part of that equation. Tools like Hunter can support your firm's business development efforts by giving you direct access to decision-makers without cold-calling or guessing at email formats. When paired with a system that actually tracks leads from first touch to signed retainer, your outreach becomes measurable rather than hopeful.
This guide walks you through exactly how to use Hunter's Domain Search feature to find email addresses, step by step. You'll learn how the tool works, what its free and paid plans include, how to use the browser extension, and where Hunter fits into a broader client acquisition strategy for your firm.
What Domain Search does and when to use it
Hunter's Domain Search is the core feature of the hunter email finder tool. You type in any company domain, such as smithlawgroup.com, and Hunter returns every professional email address it has indexed for that organization, along with the names and job titles attached to those addresses. Hunter pulls this data from publicly crawled sources across the web, including websites, press releases, and public professional profiles, then compiles them into a single searchable list so you're not hunting through pages manually.
How Domain Search pulls email data
Hunter works by continuously crawling the public web and indexing email addresses it finds on publicly accessible pages. When you run a Domain Search, Hunter surfaces those indexed results and also shows you the email format pattern the company uses, such as {first}.{last}@domain.com or {first_initial}{last}@domain.com. That pattern alone is useful: even when Hunter doesn't have a specific person's address on file, you can construct a likely address for someone you know works at that company and then verify it separately.
The email format pattern Hunter detects is often the most valuable output of a Domain Search, because it lets you build addresses for contacts that Hunter hasn't directly indexed yet.
Each result also displays a confidence score from 0 to 100, which reflects how reliably Hunter has confirmed that address is real and actively used. A score above 90 typically means the address appeared consistently across multiple verified sources. Scores below 70 warrant extra caution before you send, especially if your outreach volume is high and your sender reputation matters.
What the results show you
A completed Domain Search returns structured data you can act on immediately. Each row in the results includes the full name, job title, department, LinkedIn URL, and email address of the contact, plus the source URLs where Hunter found the address. You can filter results by department, such as management, legal, or operations, which cuts down the noise fast.

Here's a quick overview of the key fields in any Domain Search result:
When Domain Search makes sense for your firm
Domain Search is built for targeted, domain-level prospecting rather than mass list building. If you're a law firm trying to develop co-counsel relationships with firms in complementary practice areas, identify referral partners at hospitals or physical therapy clinics, or reach out to a specific vendor or media contact, Domain Search gives you a structured way to find the right person's address without a manual search.
Your firm can also use it when you know a person's name and employer but don't have their direct contact information. Rather than guessing formats or relying on a generic contact form, you search the domain, confirm the email pattern, and locate or construct the right address. This is faster than cold-calling a front desk and more targeted than submitting a contact form that may route to an admin rather than the decision-maker you actually need to reach.
Domain Search is not designed for bulk scraping or sending mass cold emails at scale. It works best as a precision tool for building smaller, high-quality outreach lists where every contact is a deliberate choice.
Step 1. Set up Hunter and know your limits
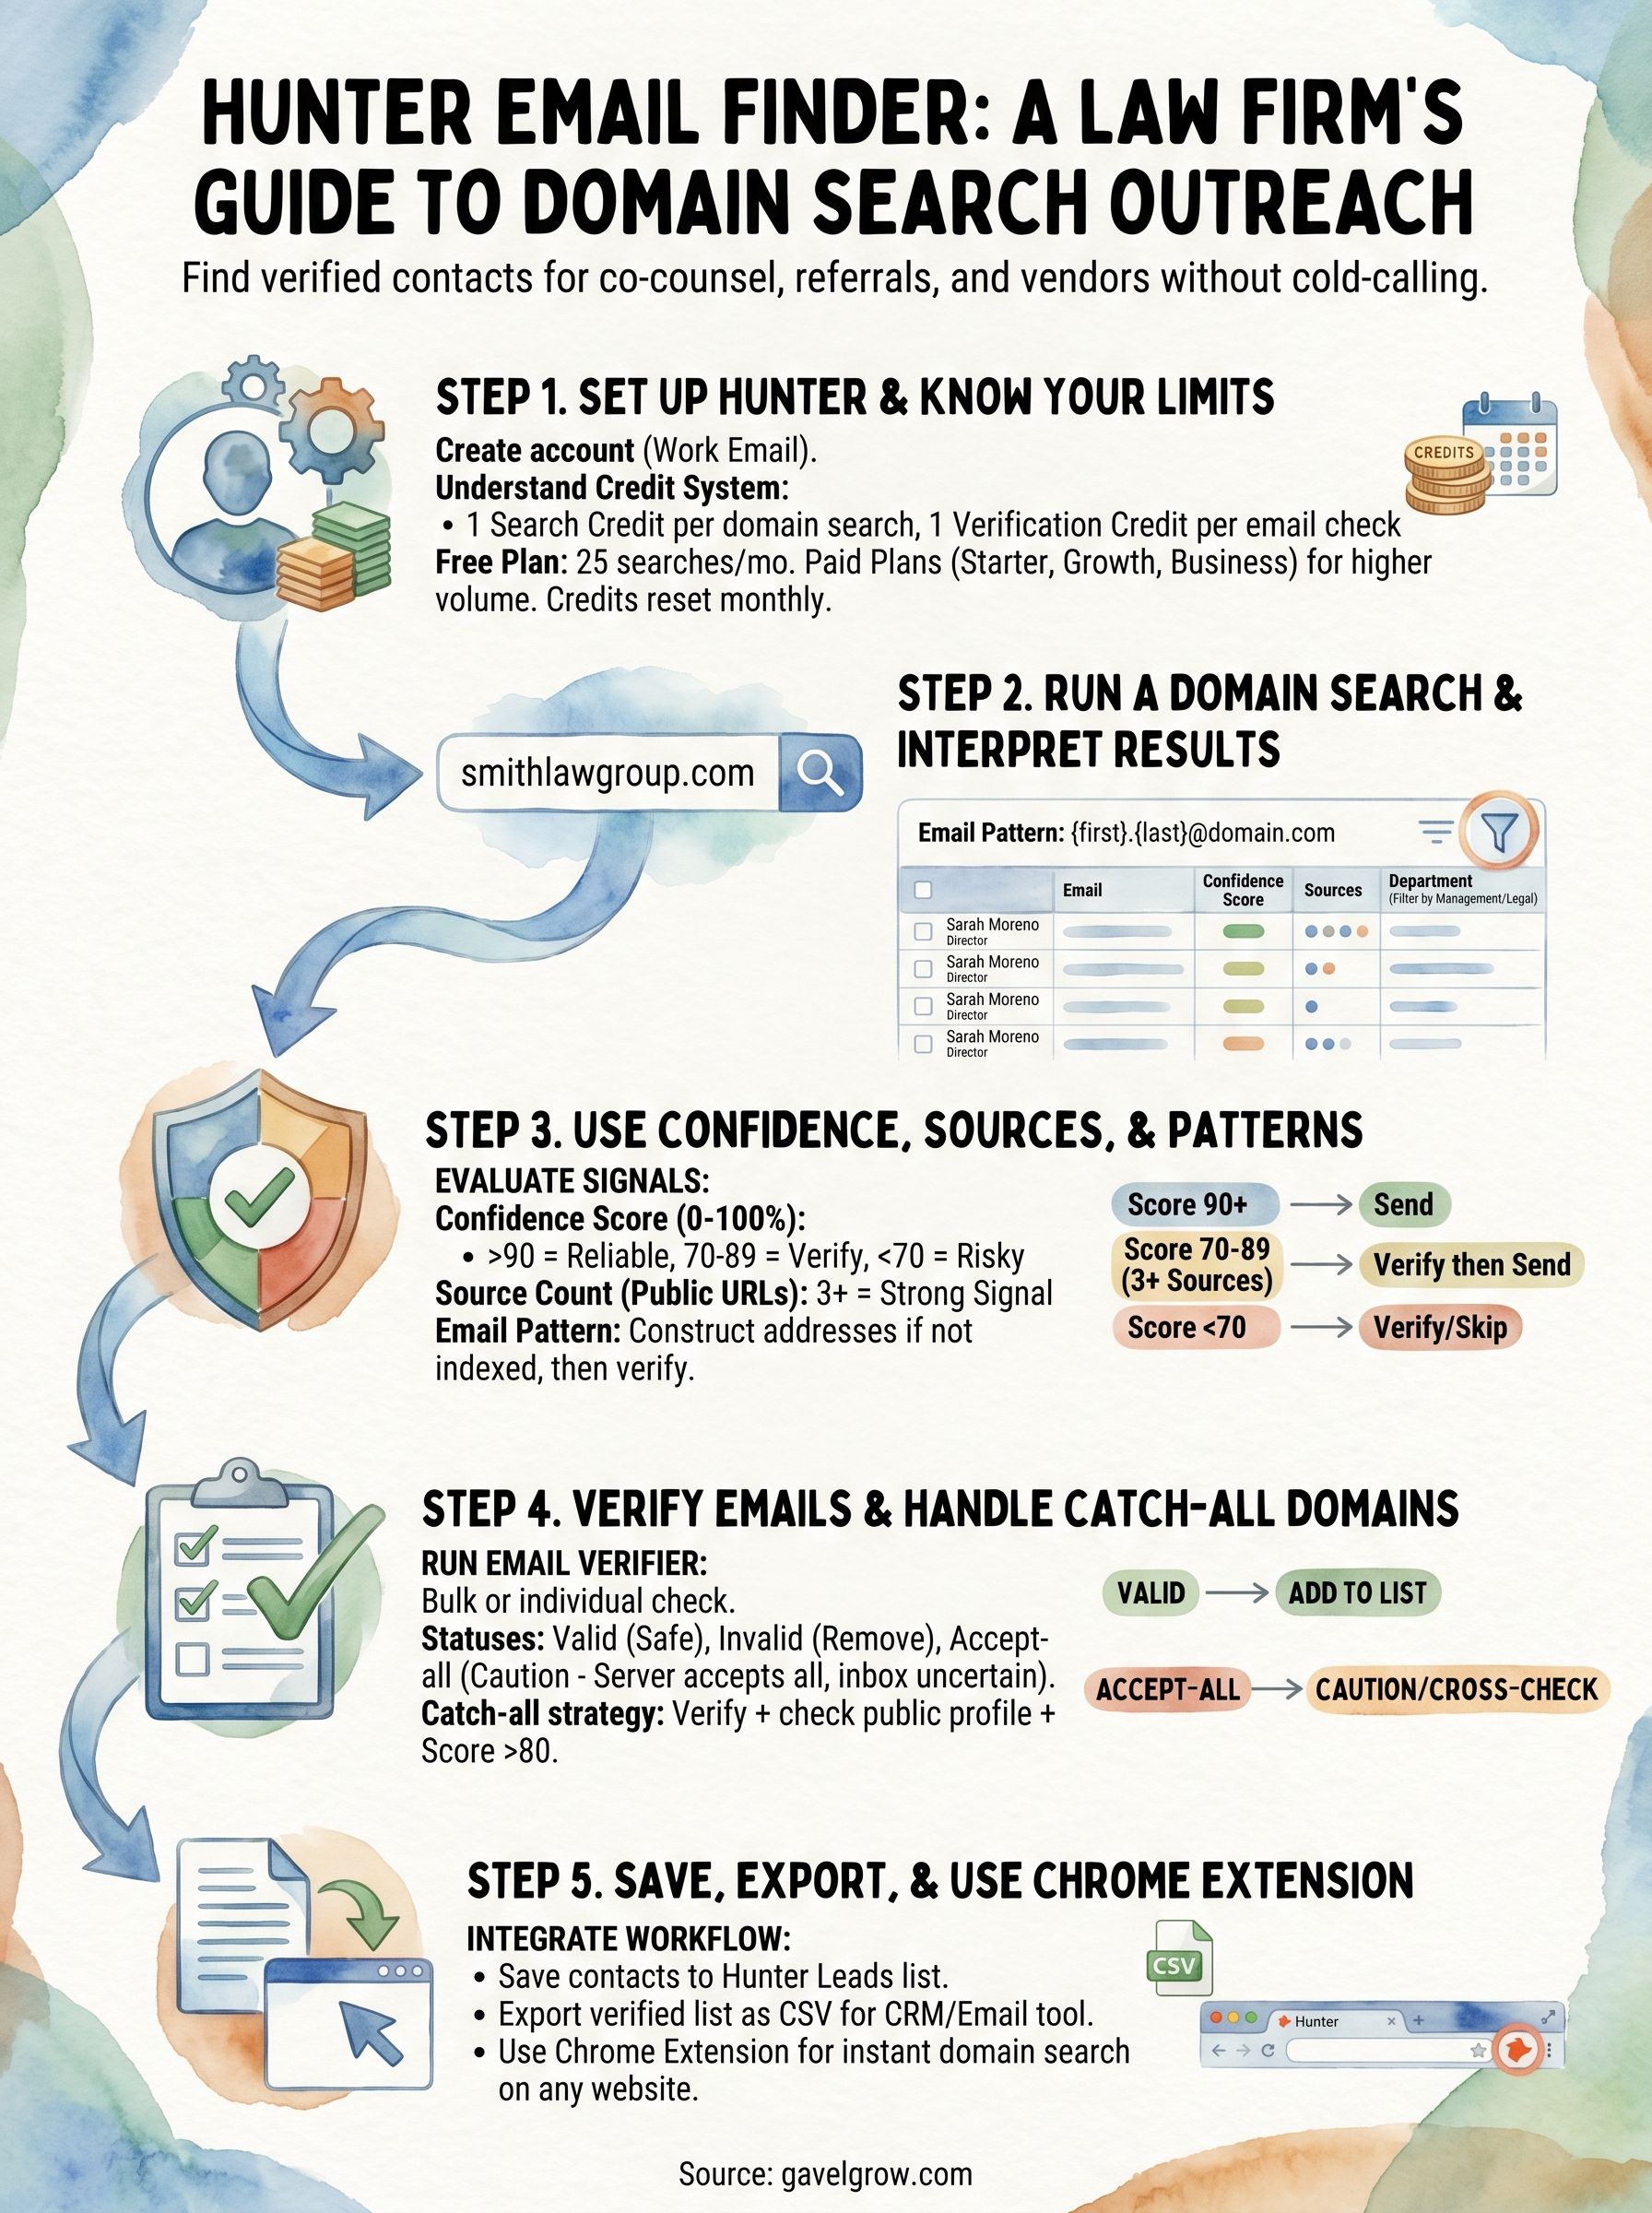
Before you run your first domain search, you need a Hunter account and a clear understanding of what your plan allows. Hunter uses a credit-based system where each Domain Search costs one search credit and each email verification costs one verification credit. Knowing your monthly allowance before you start prevents you from burning through credits on exploratory searches when you need them for actual outreach.
Create your Hunter account and pick a plan
Go to hunter.io and sign up with your work email address. The signup process takes under two minutes and does not require a credit card for the free tier. Once inside, your account dashboard shows your remaining search and verification credits for the current billing cycle.
Hunter's plan tiers break down like this:
For most law firms using the hunter email finder for targeted business development outreach, the Starter plan covers enough volume to support co-counsel and referral partner prospecting each month without overspending on a tool you use selectively.
Understand your monthly search limits
Credits reset on the same calendar day each month from your signup date, not on the first of the month. That distinction matters when you're planning outreach around a specific event or deadline. If you signed up on the 15th, your credits reset on the 15th of each month, so schedule your search sessions around that date rather than assuming you'll get a full reset at month's end.
Use your free credits on test domains first so you understand what a result looks like before you commit paid credits to real prospects.
Each Domain Search against a single domain costs one search credit, regardless of how many email addresses Hunter returns for that domain. Running the same domain twice in the same session does not charge an additional credit because Hunter caches the result temporarily. Verifying individual email addresses separately costs one verification credit per address, so batch your verifications into a single export rather than checking addresses one by one to avoid wasting your monthly allowance on duplicate work.
Step 2. Run a Domain Search and interpret the results
Once your account is set up, running a domain search takes less than a minute. Log in to hunter.io, click "Domain Search" in the left navigation, and type the domain you want to search, without the https:// prefix, directly into the search bar. Hunter returns every email address it has indexed for that domain, along with the email format pattern it detected, the number of results, and individual contact details for each address it found.
Enter the domain and filter your results
After you run the search, the results panel populates with every contact Hunter has on file for that domain. You'll see the email format pattern displayed at the top of the page, which is the most immediately useful piece of information. Below that, each row contains a contact's name, email address, job title, and department.
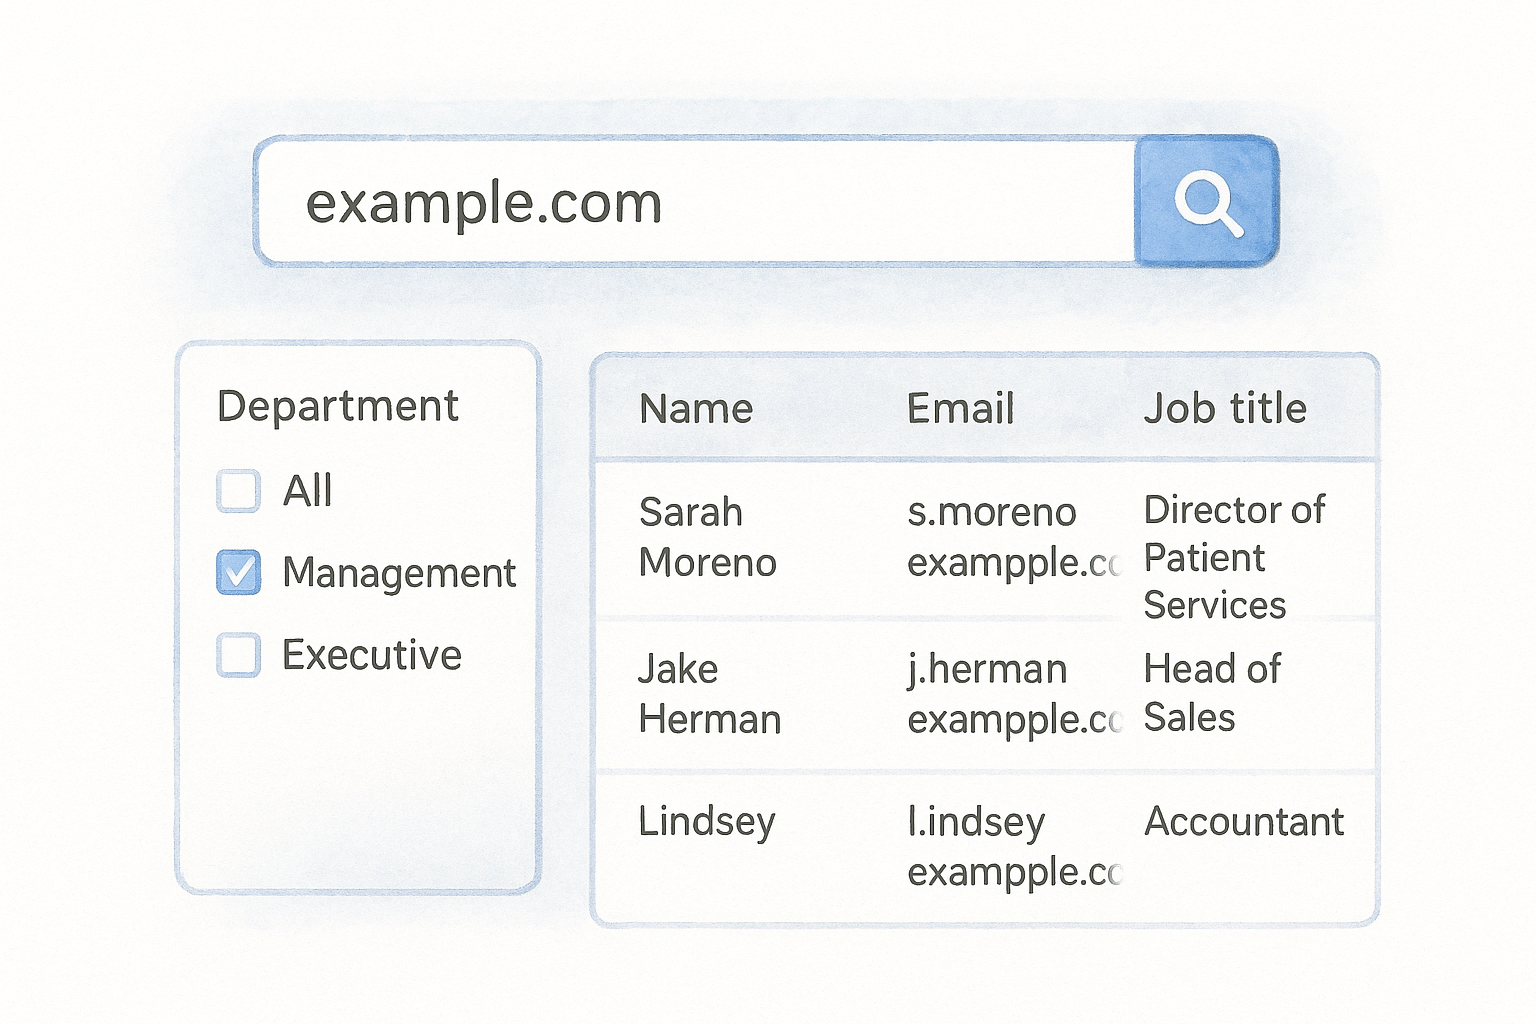
Use the department filter on the left side of the results panel to cut through the noise. If you're looking for a managing partner at a firm or a practice director at a hospital, filter by "Management" or "Executive" first. This saves you from scrolling through every entry when you only need two or three specific contacts.
Filtering by department before you export protects your verification credits because you only check the addresses that actually match your outreach criteria.
Here is how a typical domain search result row looks:
Read what Hunter is actually telling you
The hunter email finder surfaces results in order of confidence score, with the highest scores at the top by default. Each row also shows a source count, which tells you how many publicly crawled pages Hunter found that specific address on. A source count of three or more is a reliable signal that the address is actively used and not a one-time mention in an old press release.
Pay attention to addresses that appear in multiple departments or carry the same format as the detected pattern. When an address follows the company's confirmed format and carries a high source count, you can treat it as a strong lead before you even run a formal verification step.
Step 3. Use confidence, sources, and patterns to choose emails
Not every email Hunter returns belongs on your outreach list. The hunter email finder gives you three distinct signals to evaluate, and using all three together protects your sender reputation while keeping your outreach focused on contacts who will actually receive your message.
Reading confidence scores correctly
Hunter's confidence score is a percentage that reflects how consistently an address appeared across publicly crawled, verified sources. Treat any score above 90 as a reliable green light. Scores between 70 and 89 are workable, but they warrant a verification step before you send. Anything below 70 carries real bounce risk, and a pattern of bounced emails at volume can damage your sending domain's standing with major email providers like Gmail and Outlook.
Use 70 as your minimum threshold when building any outreach list, and hold addresses below that cutoff until you can verify them separately.
Using source count as a secondary check
The source count tells you how many independent public pages Hunter found the address on, which gives you a second layer of confidence beyond the score alone. An address with a score of 78 but five independent public sources is often safer than one scoring 82 from a single source. Multiple independent appearances signal that the person or their organization actively publishes the address, rather than it being a stale reference from one outdated document.
Evaluate both numbers together before adding any address to your list. Use this decision table as a quick reference:
Applying the email pattern to fill gaps
When Hunter has a confirmed email format for a domain but no indexed address for the specific person you need, you can construct the address yourself. Take the detected pattern, apply the person's name, and produce a candidate address you then run through Hunter's Email Verifier before you send to it.
For example, if the detected pattern is {first}.{last}@domain.com and you want to reach Marcus Webb, the constructed address is [email protected]. Build it, verify it, and add it to your list only if it clears verification. This approach extends the value of every domain search beyond the contacts Hunter has already indexed.
Step 4. Verify emails and handle catch-all domains
Before you send to any address the hunter email finder returns, run it through a verification step. Even high-confidence scores are not a guarantee that an inbox is active and accepting mail. Unverified addresses that bounce at volume damage your sending domain's deliverability, which means your future outreach ends up in spam filters rather than inboxes. Verification is the last checkpoint before any address earns a place on your outreach list.
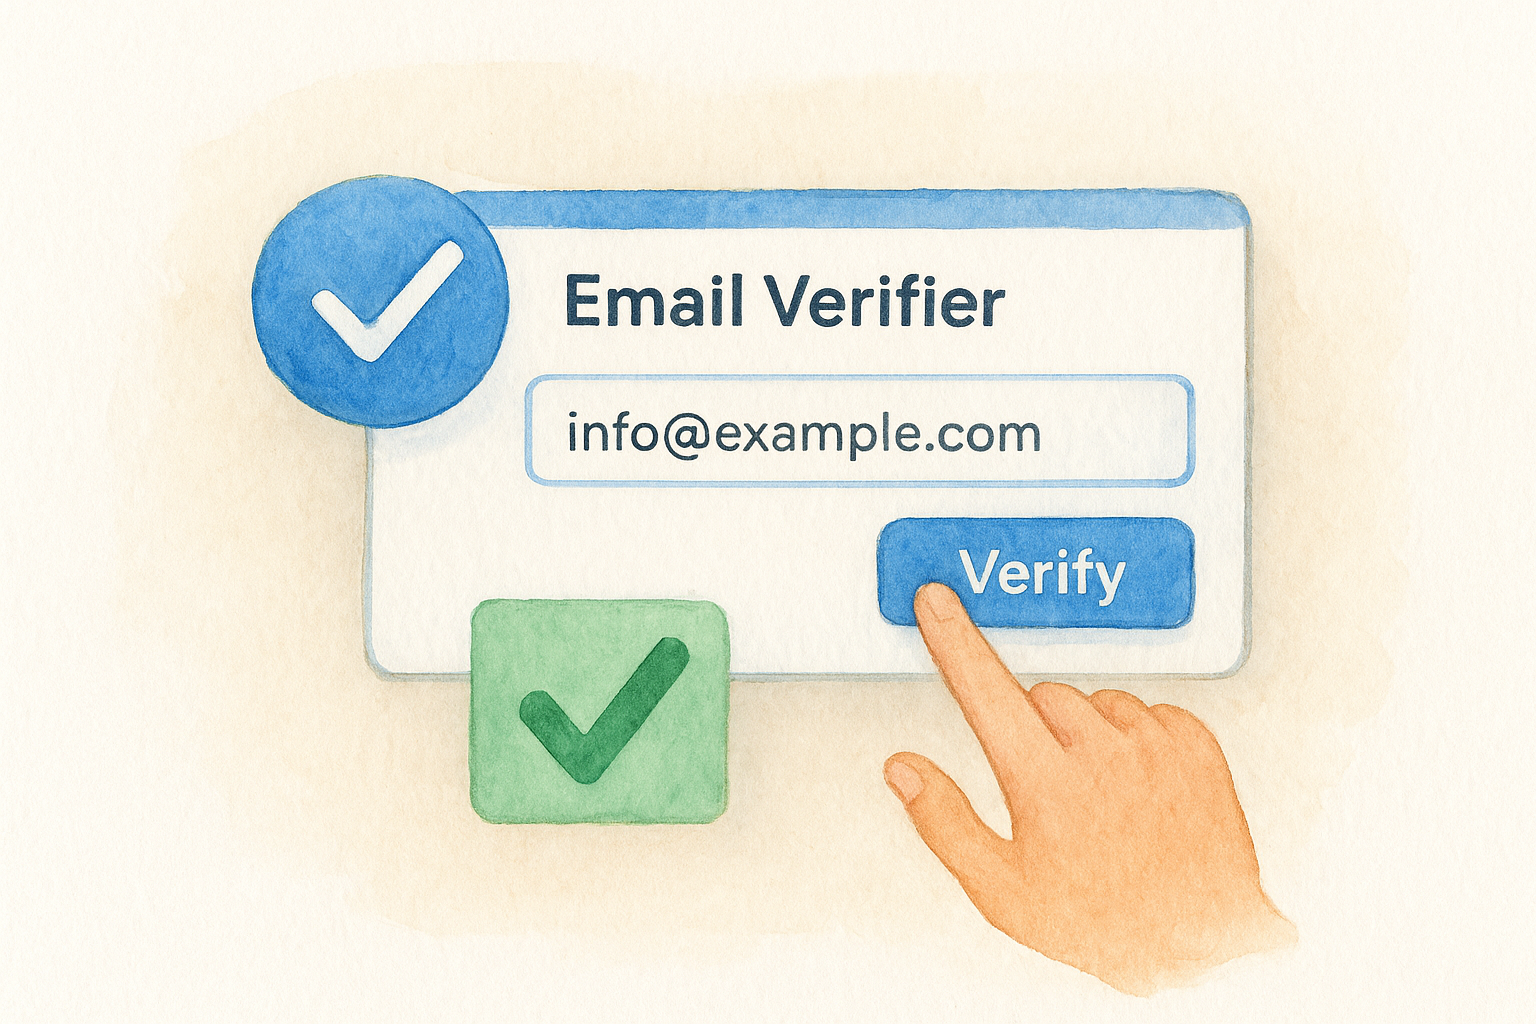
Run verification through Hunter's Email Verifier
Hunter includes a built-in Email Verifier that checks whether an address is real, formatted correctly, and connected to a live mail server. To verify a single address, click "Email Verifier" in the left navigation, paste the address into the input field, and click "Verify." Hunter returns a status within seconds.
For bulk verification, go to your Domain Search results, select the addresses you want to check using the checkboxes on the left side of each row, and click "Verify selected" at the top of the results panel. Hunter processes them in a batch and updates each row with its verification status. This approach uses fewer verification credits than checking addresses one at a time.
Run bulk verification immediately after filtering your results by department so you only spend credits on contacts that already match your outreach criteria.
Hunter assigns one of three statuses to each verified address:
What catch-all domains mean and how to handle them
A catch-all domain is configured to accept every email sent to it, no matter what appears before the "@" symbol. This means Hunter's verifier cannot confirm whether the specific address you're checking is actually monitored by a real person. The server accepts the message either way, so no bounce occurs, but delivery to an active inbox is not guaranteed.
When you encounter an accept-all status, treat the address as unconfirmed rather than verified. Cross-check the contact's name and title against their publicly available professional profile to confirm they work at the organization, and only include the address on your list if the confidence score is 80 or above. Combining a strong confidence score with an independent profile check is the most reliable way to assess catch-all addresses without access to additional data sources.
Step 5. Save, export, and use the Chrome extension
Once you've filtered your Domain Search results and verified the addresses worth keeping, you need to move them out of Hunter and into your outreach workflow. The hunter email finder gives you two ways to do this: saving contacts directly to Hunter's built-in leads list, or exporting them as a CSV file you can load into your email platform or CRM. Both options are available from the same results panel where you ran your search.
Saving contacts and exporting your list
To save individual contacts to Hunter's leads list, click the bookmark icon on the right side of each result row. Hunter adds that contact to your Leads section, where you can add notes, track outreach status, and group contacts by campaign. This works well when you're building a small, targeted list of fewer than 20 contacts and you want to manage them inside Hunter without exporting.
For larger lists, use the bulk export option. Select all the contacts you want by checking the boxes on the left of each row, then click the "Export" button at the top of the results panel. Hunter generates a CSV file that includes each contact's name, email address, confidence score, job title, department, and source URLs. A typical exported row looks like this:
Export after filtering and verifying so your CSV contains only contacts that cleared your quality threshold, not every raw result Hunter returned.
Load the exported CSV directly into your email outreach tool or CRM. If your firm uses a platform that accepts CSV imports, the Hunter export format maps cleanly without additional reformatting.
Using the Hunter Chrome extension
The Chrome extension lets you run a domain search without opening a separate browser tab. Install it from the Chrome Web Store, log in with your Hunter account, and the extension icon appears in your browser toolbar. When you're on any company website, click the icon and Hunter automatically searches the current domain and returns results in a popup panel.
This is most useful when you're reviewing a referral source or vendor's website and want to identify the right contact immediately rather than switching to a separate tab. Results pull from the same indexed database as the main tool, and you can save or verify contacts directly from the extension popup without interrupting your browsing session.
Wrap it up and put it into practice
The hunter email finder gives you a repeatable, structured way to find verified professional email addresses without guessing formats or wasting time on generic contact forms. You now know how to run a Domain Search, read confidence scores and source counts, construct addresses from detected patterns, verify results before you send, and pull everything into your outreach workflow using either the CSV export or the Chrome extension.
Start with one target domain today. Filter by department, verify your shortlist, and export a clean CSV before you write a single outreach email. That sequence keeps your sender reputation intact and your list quality high.
Building referral partnerships and co-counsel relationships through precise outreach is just one piece of growing a law firm's caseload. For a full-funnel system that tracks every lead from first contact to signed retainer, visit GavelGrow.
Frequently Asked Questions
What does Hunter's Domain Search do?
You enter any company domain and Hunter returns the professional email addresses it has indexed for that organization, along with names, job titles, and the email format pattern the company uses. It pulls this from publicly crawled sources like websites, press releases, and public professional profiles. It's built for targeted, domain-level prospecting rather than bulk scraping or mass cold emailing.
How do I read Hunter's confidence score?
The confidence score is a 0-100 rating of how consistently an address appeared across verified public sources. Treat scores above 90 as reliable, 70 to 89 as workable but worth verifying before you send, and anything below 70 as carrying real bounce risk. Use source count as a second check, since an address appearing on several independent pages is safer than one from a single source.
Can I find an email Hunter hasn't indexed for a specific person?
Yes. When Hunter has a confirmed email format for a domain but no address for your specific contact, take the detected pattern and apply the person's name to construct a candidate address. For example, a pattern of {first}.{last}@domain.com for Marcus Webb becomes [email protected]. Always run the constructed address through Hunter's Email Verifier before adding it to your list.
What is a catch-all domain and how should I handle it?
A catch-all domain accepts every email regardless of what appears before the "@", so Hunter's verifier can't confirm whether a specific address is actually monitored. When you see an accept-all status, treat the address as unconfirmed rather than verified. Cross-check the contact against their public professional profile and include the address only if the confidence score is 80 or above.
Why should I verify emails before sending outreach?
Even high-confidence scores don't guarantee an inbox is active. Unverified addresses that bounce at volume damage your sending domain's deliverability, pushing future outreach into spam filters. Filter your results by department first, then run bulk verification on only the addresses that match your criteria, and export a clean CSV so you send only to contacts that cleared your quality threshold.